Installing a
hot tub
is exciting, but proper planning is essential to ensure safety, performance, and long-term durability. A well-executed hot tub installation prevents costly problems like leaks, electrical hazards, and uneven foundations.
This guide goes beyond basic how-tos, covering everything from choosing the right location and foundation to understanding electrical requirements, permits, and delivery logistics. Whether it’s an outdoor setup on a concrete slab, a reinforced deck, or an indoor spa, you’ll find clear, practical steps to get it right.
You’ll also learn about costs, DIY versus professional installation, and answers to common questions like, “Do hot tubs need plumbing?” By the end, you’ll be ready to plan and execute a smooth, stress-free installation—so you can relax and enjoy your new hot tub with confidence.
Why Proper Hot Tub Installation Is Essential?
Hot tub installation covers everything from site selection and foundation prep to electrical hookup, delivery/placement, filling and startup, and initial water chemistry. Doing it right delivers:
- Safety: Correct GFCI and bonding protect people and property.
- Longevity: A level, load-rated base prevents shell stress and leaks.
- Comfort & costs: Thoughtful siting (wind, sun, privacy) and proper insulation/cover reduce energy use.
The upfront planning for installing a
hot tub
determines how enjoyable and low-maintenance it is for years to come.
Read Also:
Benefits of Hot tubs
Hot Tub Installation Requirements Checklist
Use this fast pass to validate your hot tub installation requirements before you schedule delivery:
Access & Placement
- Clear path from curb to final spot (measure width of gates/turns/overhangs).
- Final location is level, serviceable (equipment panel access), and has cover-lifter clearance.
Foundation / Hot Tub Pad
- Choose one: 4–6" reinforced concrete slab, code-compliant reinforced deck, or engineered prefab spa pad (model-dependent).
- Base drains away from structures; soil compacted and stable.
Read Also:
Guide to Choosing the Perfect Hot Tub
Electrical
- Dedicated circuit sized per manufacturer (often 40–60A for 240V models).
- GFCI protection, outdoor-rated disconnect in line-of-sight (distance by code).
- Correct wire gauge and wet-location conduit/fittings; proper bonding/grounding.
Permits & Rules
- Electrical/building permits as required.
- HOA or zoning rules (setbacks, visibility, fencing/barriers, noise).
Water
- Nearby hose for filling; planned drain path for periodic water changes.
Delivery
- Sled/dolly or crane arranged as needed; protect surfaces on route.
Indoor Installs (if applicable)
- Waterproof finishes + vapor barrier, powered ventilation (humidity sensor ideal).
- Floor drain or catch pan; dehumidification in cold climates.
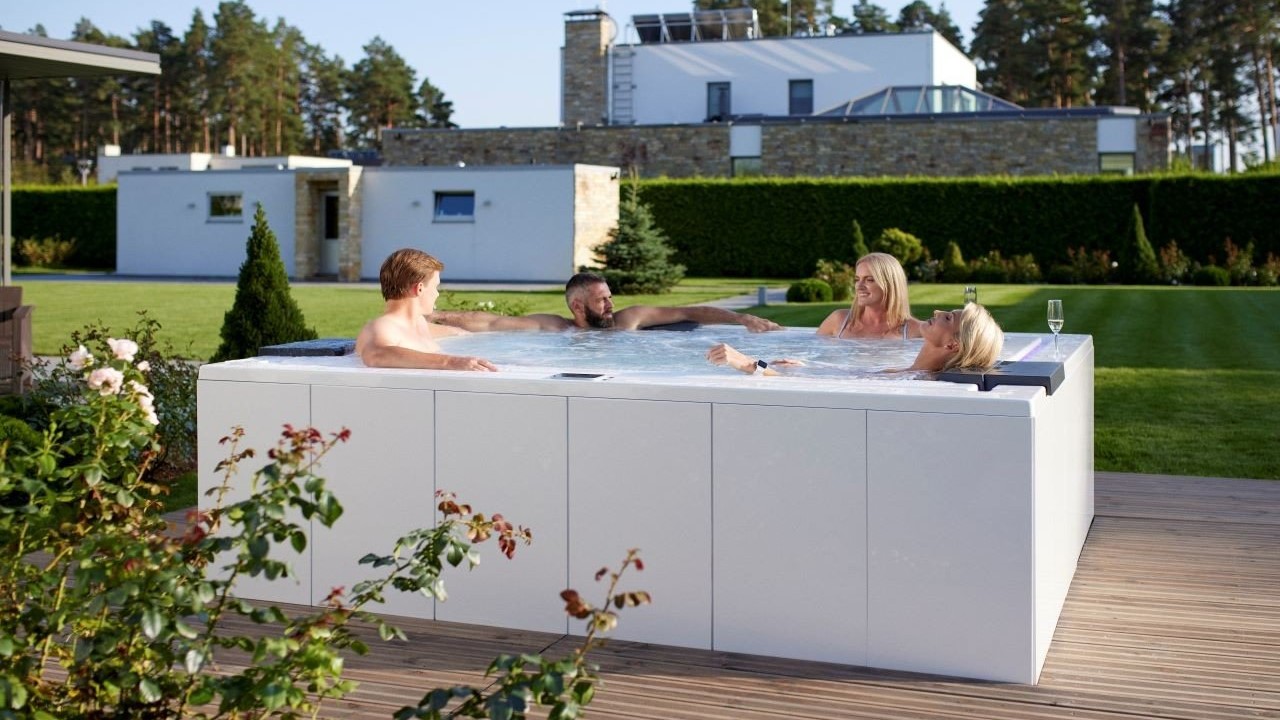
Choosing the Location: Indoor vs Outdoor Hot Tub
Selecting the right location for your
hot tub
is one of the most important steps in the installation process. The spot you choose impacts everything from ease of use and maintenance to safety and long-term durability. A well-planned location ensures proper ventilation, drainage, privacy, and access for future servicing.
Before you commit, consider whether an indoor or outdoor installation best fits your space, lifestyle, and climate. Each option has its benefits and challenges, so weighing them carefully will help you create a setup that’s both functional and enjoyable.
Outdoor Installs
Pros: Easier ventilation, simpler drainage, big sky views.
Watch for: Wind exposure (heat loss), splash/runoff near foundations, slope/ice, neighbors’ sightlines.
Pro tips
- Place near the house for convenient access but not under heavy roof runoff.
- Wind screens and privacy panels/plantings improve comfort but maintain service access.
Indoor Installs
Pros: Year-round comfort, privacy, weatherproof.
Watch for: Humidity and condensation. Use a powered exhaust sized to room volume and moisture load, vapor-barrier assemblies, and moisture-tolerant finishes. A floor drain simplifies draining and spill control.
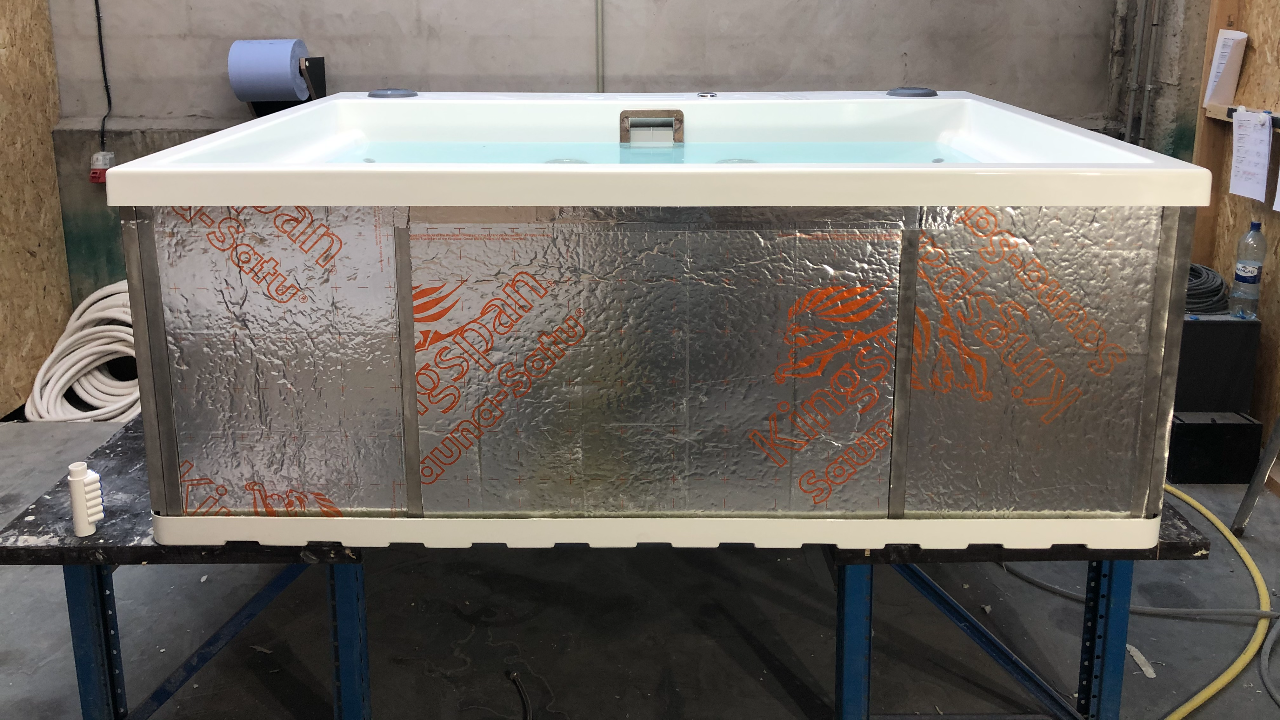
Foundation & Support: Your Hot Tub Pad Options
A strong, level base is non-negotiable. It protects the shell and plumbing, keeps doors/cover aligned, and prevents water pooling.
1) Concrete Slab (Most Reliable)
- 4–6" with rebar/mesh on compacted base; pad slightly larger than the spa footprint.
- Pitch water away from structures.
- Ideal for most above-ground and semi-recessed installs.
2) Reinforced Deck (When Designed Correctly)
- Verify filled weight (tub + water + bathers).
- Quick calc: Filled weight ≈ Dry weight + (gallons × 8.34 lb) + people.
- Add beams/footings under corners; confirm joist spacing.
- Provide removable deck boards or service hatch for equipment access.
3) Engineered / Prefab Spa Pads (Model-Dependent)
- Interlocking structural pads over compacted base can work for certain light to mid-size models when the manufacturer allows.
- Follow exact installation of
hot tub
pad specs; keep perfectly level.
Electrical Requirements (110/120V vs 220/240V, GFCI, Wire Gauge)
Proper electrical setup is critical for a safe and efficient hot tub installation. Choosing the right voltage and ensuring all wiring meets local codes helps prevent hazards, power issues, and costly repairs. Here’s what you need to know about voltage options, essential components, and safety measures.
Voltage & Performance
- 110/120V (“plug-and-play”): simpler setup, slower heating and limited simultaneous jet/heat capability.
- 220/240V (hard-wired): requires licensed electrician; faster heat, full-power operation.
Core Electrical Elements
- Dedicated breaker sized per the spa’s nameplate (often 40–60A for 240V).
- GFCI protection and an outdoor-rated disconnect within line-of-sight.
- Conduit & conductors rated for wet locations; gauge sized for load and run length.
- Bonding/grounding per code; no shared neutrals that can cause nuisance trips.
Plumbing & Water: Do Hot Tubs Need Plumbing?
For portable/above-ground units, no separate household plumbing is required. The spa is self-contained:
- Fill with a garden hose (ideally through the filter well to reduce airlocks).
- Circulation/filtration happens within the cabinet.
- Drain via built-in drain or a submersible pump a few times per year.
In-ground or recessed spas may involve added drains, equipment vaults, and access planning—which is pro territory.
Delivery Logistics & Access Planning
A smooth delivery day starts weeks earlier.
- Measure every gate, turn, stair, and overhead clearance from street to site.
- Typical deliveries use a spa sled/dolly on the spa’s side; crane when access is impossible.
- Protect surfaces (ply sheets on turf/pavers).
- Clear furniture, planters, branches, gutters at snags.
- Reserve street parking for the truck and, if needed, a crane.
Cover lifter clearance: leave 12–24 in. behind the tub (per product/lifter model) and keep the equipment panel accessible.
Step-by-Step: Installing a Hot Tub (From Pad to Power-Up)
This is the practical of how to install a
hot tub
sequence you can follow or hand to your contractor.
1) Pre-Site Walkthrough
- Confirm model, dimensions, dry/filled weight, electrical spec, and delivery path.
2) Build the Base
- Concrete: excavate, compact base, form, place rebar/mesh, pour, trowel/float, cure, level check.
- Deck: reinforce beams/joists; add footings and blocking under corners.
- Spa pad: prepare compacted base and interlock panels per manufacturer.
3) Electrical Rough-In
- Install conduit from the main/sub panel to the disconnect location.
- Pull conductors; leave final terminations for after placement.
- Do not energize until the tub is filled to recommended level.
4) Delivery & Placement
- Move on sled/dolly or crane; orient so equipment panel is accessible and cover-lifter clears obstacles.
- Verify level in both directions.
5) Final Electrical Hook-Up
- Licensed electrician lands conductors per wiring diagram, confirms bonding/grounding, installs GFCI.
- Label the breaker; install appropriate in-use covers outdoors.
6) Fill the Spa
- Insert the hose into the filter canister (helps purge air).
- Fill to marked line or 2" above highest back jet (model-dependent).
7) Power-Up & System Check
- Restore power; verify pumps, heater, lights, control panel.
- Confirm no GFCI trips; check for leaks at unions.
8) Balance Water & Shock
- Adjust alkalinity first, then pH; add sanitizer and initial shock.
- Heat-up time varies (240V is faster; 110/120V may take overnight).
9) Owner Walkthrough
- Cover operation and locks, weekly care, filter cleaning, draining schedule, winter settings.
Costs & Timelines: Upfront & Ongoing
Upfront (ranges vary by region, site, and model):
- Foundation: Concrete or deck reinforcement depends on size and access.
- Electrical: Dedicated circuit with GFCI/disconnect, conduit run, panel capacity; longer runs and trenching cost more.
- Delivery: Standard dolly vs crane (charged by reach/hour).
- Permits: Electrical and, in some jurisdictions, building/zoning.
- Labor: Installer/electrician rates and number of site visits.
Timeline (typical):
- Base: 1–2 days (plus concrete cure time).
- Electrical: ½–1 day rough-in + ½ day final hookup.
- Delivery/placement: hours (longer if crane).
- Fill & heat: same day for 240V; overnight for 110/120V.
Ongoing costs:
- Energy (insulation quality, cover discipline, wind exposure, climate).
- Water care (sanitizer, shock, filters).
- Periodic parts (seals, pillows, cover replacement over years).
DIY vs Professional Installation
When it comes to installing a
hot tub
, deciding between a DIY approach and hiring professionals is an important step. While some tasks are straightforward and manageable for homeowners, others require specialized skills, tools, and knowledge of building codes. Knowing what you can safely handle yourself—and when to call in the experts—can save you time, money, and potential safety risks.
Safe DIY candidates
- Site planning, measuring access, clearing obstacles.
- Concrete forming (experienced DIYers) or arranging a contractor.
- Filling and basic water care after install.
Leave to pros
- Electrical (code compliance, GFCI, bonding/grounding).
- Structural engineering for decks, balconies, rooftops.
- Crane lifts and in-ground/recessed builds.
- Any work requiring permits.
Common Mistakes to Avoid
- Unlevel/under-engineered base → shell stress, leaks, misaligned doors.
- Undersized electrical or shared neutrals → heater underperformance, GFCI trips.
- No service access to the equipment panel → costly future repairs.
- Ignoring drainage → water pooling near foundations, mold, heave in freeze.
- Skipping permits → insurance issues, forced redo.
- Cover-lifter clearance not planned → daily frustration, heat loss.
Maintenance & Longevity After Installation
- Weekly: Test/adjust sanitizer, pH, alkalinity; rinse filter as needed.
- Monthly/Quarterly: Deep-clean filters; inspect cover straps; wipe waterline.
- Seasonal: Drain/refill cadence per system; winterize (cold climates) if unused.
- Annually: Inspect GFCI, unions, cabinet insulation; evaluate cover integrity.
Energy tips
- Always close and latch the cover; use a lifter to make it effortless.
- Add wind screens; program filtration cycles thoughtfully.
- Keep insulation and cover seals in top shape.
Hot Tub Installation - Frequently Asked Questions
How to install a hot tub at home?
Follow the step-by-step sequence above: build a level, load-rated base; arrange dedicated GFCI electrical; plan delivery path or crane; place, fill, power-up, and balance water. Electrical and deck engineering should be done by licensed pros.
What do you need to install a hot tub?
You need: access path, a hot tub pad (concrete/deck/prefab), dedicated circuit with GFCI and disconnect, a hose to fill, a drain path, and any required permits/HOA approvals.
Do hot tubs need plumbing?
For portable/above-ground spas, no household plumbing connection is required—fill with a garden hose and drain periodically. In-ground/recessed builds may require additional drains and access.
How do I hook up a hot tub electrically?
Most premium models are 220/240V, hard-wired on a dedicated GFCI circuit with an outdoor disconnect. A licensed electrician sizes the breaker, wire gauge, and conduit and completes bonding/grounding per code.
Can I install a hot tub on a deck?
Yes—if it’s engineered for the filled weight (tub + water + people). Reinforce joists/footings, add beams under corners, and keep equipment access free.
Indoor vs outdoor hot tub installation—what’s better?
Outdoor is simpler for ventilation/drainage. Indoor offers all-weather privacy but requires vapor barriers, powered exhaust, moisture-tolerant finishes, and a floor drain.
How long does hot tub installation take?
Base 1–2 days (+ cure time for concrete), electrical ½–1 day, delivery hours, heat-up same day (240V) or overnight (110/120V).
What are the biggest mistakes in hot tub installations?
Unlevel base, wrong electrical, blocked service access, no drainage plan, and skipped permits.
How to plumb a Jacuzzi tub (brand-specific or in-ground)?
Portable Jacuzzi®-style above-ground units don’t connect to house plumbing—hose fill only. In-ground or recessed requires pro design: drains, access vault, electrical separation to code. (Targets: “how to plumb a jacuzzi tub,” “installation jacuzzi,” “jacuzzi installation.”)
Conclusion & Next Steps
A great hot tub installation is the product of planning + permitting + professional electrical + a level, load-rated base. Get those pillars right and everything else—from delivery day to the first soak—feels effortless.
Ready to move from planning to relaxing?
- Choose your location and
hot tub
pad strategy.
- Book a licensed electrician for the dedicated GFCI circuit.
- Prepare your delivery path (or crane) and service access.
- Then fill, heat, balance, and enjoy.
If you’re comparing models, foundation options, or electrical setups, AquaticaUSA can help you evaluate the right configuration for your space and climate—so your spa is safe, efficient, and built to last.
Explore our expert guides to find the ideal setup for your space:
Outdoors,
Spas,
Hot tubs,
How tos,
Installation
We hope you have found this article helpful to make your bathroom your own little haven
Send us an email if you have more questions


.jpg)
.jpg)
.jpg)
.jpg)
.jpg)
.jpg)
.jpg)
.jpg)
.jpg)

.jpg)
-(web).jpg)

.jpg)
.jpg)
.jpg)
.jpg)
.jpg)
.jpg)

![aquatica downtown 2 spa with thermory wooden siding (2) (720)[1]](http://cdn.aquaticausa.com/cache/images/150x100a/data/aquatica-downtown-2-spa-with-thermory-wooden-siding-(2)-(720)[1].jpg)


.jpg)
.jpg)
.jpg)
.jpg)
-(web).jpg)

.jpg)

Comments: