Tired of your tub faucet dripping nonstop? Wondering how to change out a bathtub faucet yourself without hiring a plumber? You’re not alone. Thousands of homeowners search every month for simple, clear answers on bathtub faucet replacement—and this guide is here to help you do just that.
Whether your faucet is leaking, rusty, hard to turn, or simply outdated, replacing it yourself is easier than you think. No need to feel overwhelmed. With the right tools, a bit of time, and this easy-to-follow guide, you’ll be able to replace a bathtub faucet step-by-step—even if you’ve never done it before.
In this complete walkthrough, you’ll learn:
- How to identify your current faucet type
- What tools and materials you need
- A simple guide to removing the old tub faucet
- How to install the new one without making a mess
- What to do if you run into problems
- When it’s better to call a plumber
We’ll also help you understand the different types of faucets (like slip-on vs. screw-on), how to replace faucet handles only, and what to do if the leak continues even after replacement.
The best part? We’re keeping this guide simple, clear, and practical. Everything is broken down into easy chunks with plain language. You don’t need plumbing experience. If you can use a wrench and follow steps, you can do this.
Let’s start by understanding why you might need to replace your bathtub faucet.
Why You Might Need to Replace Your Bathtub Faucet
Replacing a bathtub faucet isn’t just about fixing leaks—it can also improve your bathroom’s look, save water, and make using your tub more comfortable. Here are the most common reasons people decide to change out a bathtub faucet.
Common Problems with Old Tub Faucets
Leaks and Drips
A leaky faucet is the most obvious sign it’s time for a replacement. Not only does it waste water, but the constant dripping sound can be annoying. In many cases, leaks come from worn-out washers or damaged internal components.
Poor Water Pressure
If your tub takes forever to fill or the water flow feels weak, your old faucet might be clogged with mineral buildup, especially in areas with hard water. Replacing it can restore normal water pressure.
Rust and Corrosion
Old faucets—especially those made of cheap materials—can rust over time. Rust doesn’t just look bad; it can also affect how the faucet works and even lead to water contamination in extreme cases.
Outdated Look
Sometimes, the faucet works fine but doesn’t match the style of your bathroom. Upgrading to a modern design can make a big difference, especially if you're remodeling or trying to increase home value.
Water Efficiency
Newer faucets are designed to use less water without sacrificing performance. Replacing an old faucet with a water-efficient one can help lower your utility bills and reduce your water use.
Signs It’s Time to Replace Your Faucet
- The faucet drips even after turning it off completely
- You see rust or mineral deposits
- It’s hard to turn the handles
- You’re doing a bathroom upgrade
- The water flow is uneven or weak
- You want to reduce your water usage
Can You Fix It Instead?
Sometimes, a faucet leak can be fixed by replacing a washer or tightening a loose screw. But if you’ve already tried that, or if the faucet is more than 10 years old, replacing it is usually the smarter choice.
Save Money and Stress
Replacing a tub faucet now can save you money in the long run by preventing:
- Water damage from constant leaks
- Higher water bills
- Emergency plumbing calls later
Tools and Materials You’ll Need
Before you start your bathtub faucet replacement, it’s important to have everything ready. The process is much easier when you don’t have to stop halfway to search for a missing tool or part.
Basic Tools Required
- Adjustable Wrench: Used to loosen and tighten the faucet.
- Screwdrivers (Flathead and Phillips): Needed for removing screws from faucet handles or escutcheons.
- Plumber’s Tape (Teflon Tape): Wrap this around threads to prevent leaks.
- Hex Key (Allen Wrench): If your faucet is slip-on, you’ll likely need this to remove the set screw.
- Utility Knife or Caulk Remover: For removing any old caulk around the faucet.
- Bucket or Towel: To catch any remaining water in the pipes.
- Lubricant (WD-40): Useful if any parts are rusted or stuck.
- Cleaning Cloth: Wipe away any debris or grime on the pipe.
- Measuring Tape: Helps confirm the faucet will fit your setup.
Faucet Replacement Parts You Might Need
How to Replace a bathtub spout
Depending on your setup and what you’re replacing, you may also need:
- New Bathtub Faucet (Spout and Handles): Make sure the style matches your existing plumbing—either slip-on or screw-on.
- Faucet Handles: If you’re just changing the handles, ensure they match the valve stems.
- Diverter Valve (if applicable): For tub/shower combinations, the diverter directs water to the showerhead.
- Mounting Hardware: Screws, washers, and escutcheon plates.
- Caulk or Silicone Sealant: To seal around the faucet and prevent water from getting behind the wall.
Checklist for Shopping or Gathering Materials
| Item
|
Required For
|
Notes
|
| Adjustable Wrench
|
Removing/installing spout
|
Get one with a good grip
|
| Screwdrivers (Flathead + Phillips)
|
Removing screws
|
Most common types
|
| Plumber’s Tape
|
Sealing threads to prevent leaks
|
Wrap clockwise
|
| Hex Key
|
Removing slip-on faucet
|
Check the faucet size
|
| Replacement Faucet
|
New fixture
|
Match slip-on or threaded design
|
| Towel/Bucket
|
Prevent mess
|
Keep floor dry
|
| Utility Knife
|
Removing old caulk
|
Use with care
|
| Cleaning Cloth
|
Cleaning old threads
|
Avoid debris buildup
|
| Silicone Sealant
|
Waterproofing edges
|
Optional but recommended
|
Once all your tools and materials are ready, you're set to begin the replacement. Now, let’s know how to prepare the work area and turn off the water supply safely.
Step-by-Step Guide: How to Replace a Bathtub Faucet
This guide will show you how to replace your bathtub faucet in 7 clear steps. Whether you're changing out a tub spout, faucet handles, or the whole setup, the process is straightforward if you follow these instructions.
Step 1 – Shut Off the Water Supply
Before doing anything, you must stop water from flowing through the pipes. Most bathtub faucets don’t have an individual shut-off valve.
Here’s how to do it:
- Turn off the main water supply to your home. It’s usually located near the water meter or in a basement/utility room.
- Turn the bathtub faucet on to release any leftover water in the pipes.
- Leave a towel or bucket below the faucet to catch any drips.
Tip: Don’t skip this step. Even a small amount of water pressure can cause a mess or make removing parts difficult.
Step 2 – Drain Remaining Water from Pipes
Once the water supply is off:
- Turn on the bathtub faucet to let out any trapped water.
- If you’re replacing a shower diverter as well, turn the diverter to let water flow from the shower head to drain it too.
- Wait a minute or two to make sure no water remains in the pipes.
This keeps your work area dry and reduces the chance of slipping or dropping tools.
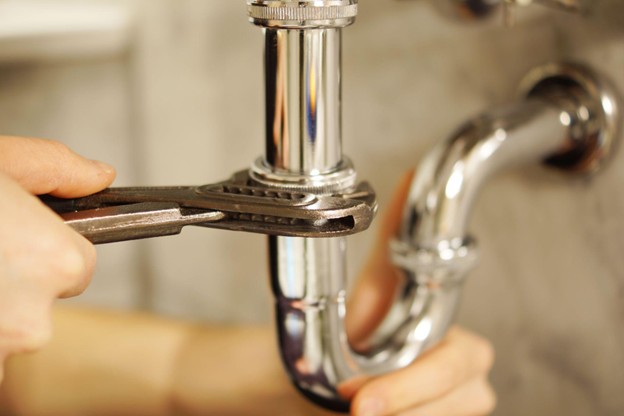
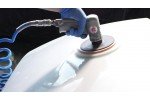
Step 3 – How to Remove Old Bathtub Fixtures
Now it’s time to take off the old faucet and handles. The removal process depends on the type of faucet you have. There are two main types of tub spouts:
1. Screw-On Spout (Threaded)
- Try turning the spout counterclockwise by hand.
- If it won’t budge, wrap a cloth around it and use an adjustable wrench.
- If it’s rusted or stuck, spray some lubricant and wait a few minutes.
- Once loose, unscrew and slide it off the pipe.
2. Slip-On Spout
- Look underneath the spout for a small set screw.
- Use a hex key (Allen wrench) to loosen the screw.
- Gently pull the spout straight out.
- Score any caulk around the base with a utility knife if it’s stuck.
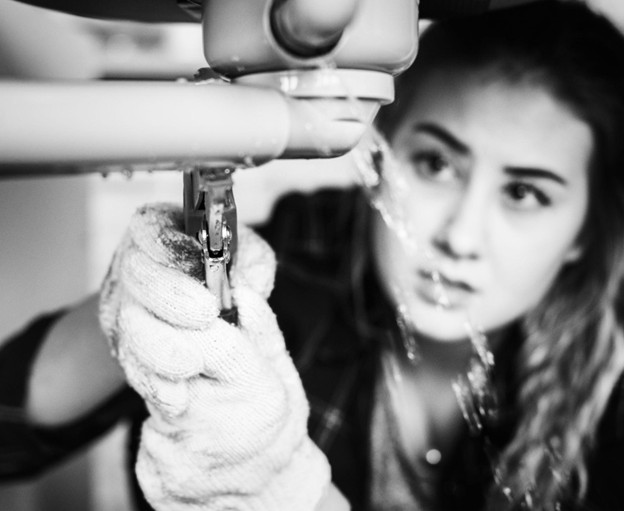
How to Remove Faucet Handles
- Use a screwdriver to remove any visible screws on the handle.
- If there’s a cap hiding the screw, pop it off with a flathead screwdriver.
- Pull the handle off. If it’s stuck, gently wiggle it back and forth.
- Behind the handle, you may see a retaining nut—use a wrench to unscrew it.
- If replacing the valve stem, use a pipe wrench to remove it.
Tip: Take photos of each step to help when installing the new parts.
Step 4 – Clean the Faucet Mounting Area
With the old fixtures removed:
- Wipe the pipe and surrounding area with a clean cloth.
- Remove any old plumber’s tape from the threads.
- If there’s leftover caulk, scrape it away carefully using a utility knife or caulk remover.
- Check the pipe for rust, debris, or damage.
A clean surface ensures the new faucet will install smoothly and form a proper seal.
Step 5 – How to Put on a New Bathtub Faucet
Now it’s time to install the new spout and/or handles.
Installing a Screw-On Faucet
- Wrap plumber’s tape clockwise around the pipe threads (2–3 layers).
- Thread the new faucet onto the pipe by hand.
- Tighten it gently with a wrench—but don’t overtighten.
Installing a Slip-On Faucet
- Slide the faucet onto the copper pipe.
- Tighten the set screw underneath using a hex key.
- Make sure the spout opening faces straight down.
Replacing Faucet Handles
- Slide the new handle over the stem.
- Secure with the screw or nut provided.
- Add the decorative cap if included.
- If you replaced the valve stems, screw them in first and tighten them securely.
Step 6 – Secure Fixtures and Apply Sealant
- Apply a thin line of silicone sealant around the base of the faucet spout and handles.
- Smooth it with your finger or a caulk finishing tool.
- Let it dry for the recommended time (usually a few hours).
Sealant helps prevent water from seeping behind the wall, which could lead to mold or water damage.
Step 7 – Test for Leaks and Water Flow
Once everything is in place:
- Turn the water supply back on.
- Turn the faucet handles and let the water run for a few minutes.
- Check for leaks around the spout, handles, and connection points.
- If there’s any dripping, turn the water off again, tighten fittings slightly, or reapply plumber’s tape.
Once there are no leaks, your bathtub faucet replacement is done!
How to Fix a Leaking Bathtub Faucet | The Home Depot
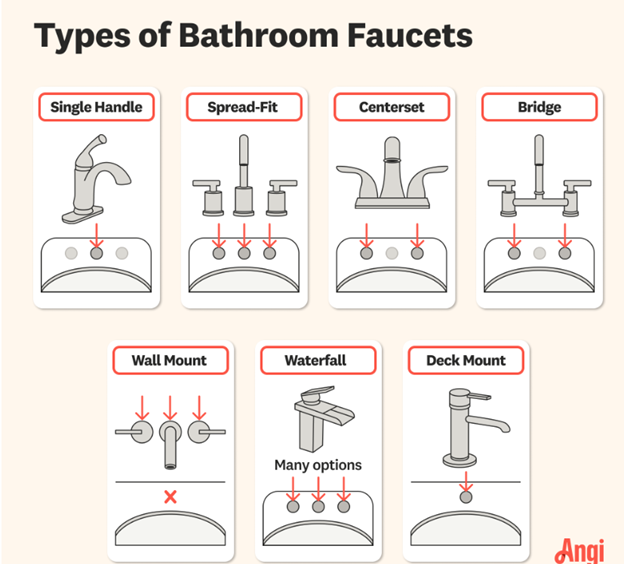
Types of Bathtub Faucets and Installation Methods
Source:
Angi
Understanding the type of faucet you have is key to replacing it correctly. Not all faucets are the same, and choosing the wrong one can lead to compatibility issues, leaks, or poor water flow. Common types of bathtub faucets
1. Single-Handle Faucets
- One handle controls both hot and cold water.
- Common in modern tubs and showers.
- Easy to use and install.
- Usually connected to a mixing valve behind the wall.
2. Double-Handle Faucets
- One handle for hot water, one for cold.
- Offers precise temperature control.
- Often found in older or classic-style bathrooms.
- Each handle is connected to its own valve.
3. Three-Handle Faucets
- Includes separate hot and cold handles and a middle diverter to control water flow to the shower or tub.
- Common in older tub/shower combos.
- Replacement can be more complex, as you may need to change the entire valve system inside the wall.
Types Based on Mounting Style
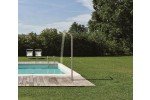
4. Wall-Mounted Faucets
- Installed on the wall above the bathtub.
- Often used with clawfoot tubs or
freestanding tubs.
- Requires precise alignment with the plumbing behind the wall.
- Looks clean and saves space.
5. Deck-Mounted Faucets
- Mounted on the rim of the bathtub.
- Common in built-in or drop-in tubs.
- Easy access to plumbing for installation and maintenance.
- Often includes handheld sprayer attachments.
6. Roman Tub Faucets
- Similar to deck-mounted but often wider with a more elegant design.
- Popular in high-end bathrooms and
walk-in bathtubs.
- May require a custom installation due to unique spacing.
Faucet Spout Styles
| Spout Type
|
Installation Method
|
Notes
|
| Slip-On
|
Slides onto a copper pipe
|
Uses a set screw to stay in place
|
| Screw-On
|
Threads onto pipe
|
Wrap threads with plumber’s tape
|
| Diverter Spout
|
Directs water to showerhead
|
Found in tub/shower combos
|
Matching Faucet Type to Your Bathtub
To avoid issues:
- Check your current faucet’s connection type (threaded or slip-on).
- Measure the pipe size and length.
- Look at where the faucet is mounted (wall or tub deck).
- Consider the water control setup (single or double handle).
- Make sure the new faucet is compatible with your tub’s plumbing layout.
Tip: If your tub is older, you might need an adapter or a universal faucet kit to ensure a proper fit.
How to Choose the Right Faucet for Your Tub
Choosing the right bathtub faucet isn’t just about picking one that looks good. It needs to fit your plumbing, work with your bathtub style, and deliver the right water pressure. Here's how to choose the best faucet for a smooth installation and long-lasting performance.
Know Your Connection Type
Start by checking how your current faucet connects to the pipe:
Threaded (Screw-On) Faucet
- Has internal threads that twist onto the pipe.
- Common in older homes.
- You’ll need to match the thread size.
Slip-On Faucet
- Slides onto the pipe and is secured with a set screw.
- Easier to remove and install.
- Ideal for modern homes with copper pipes.
How to check: Look underneath the spout. If you see a screw, it’s a slip-on. If not, try turning the faucet counterclockwise—if it unscrews, it’s threaded.
Match Faucet to Your Plumbing
Use a measuring tape to check:
- The diameter of the pipe
- The distance from the wall to the pipe end
- Whether your setup is wall-mounted or deck-mounted
Tip: Bring your old faucet or a picture when buying a new one to match the specs.
Match the Style to Your Bathroom
Faucets come in many styles, from sleek chrome to vintage brass. While looks matter, also consider:
- Handle type: Single-handle for convenience or double-handle for precise temperature control.
- Finish durability: Chrome and brushed nickel are great for high-traffic bathrooms.
- Shape and reach: Ensure the spout reaches far enough over the tub to avoid splashing.
Consider Water Flow Needs
Water flow rate is measured in gallons per minute (GPM). A higher GPM fills your tub faster.
| GPM Rating
|
Fills Tub In
|
Best For
|
| 1.5 – 2.0
|
Slow
|
Water-saving homes
|
| 2.5 – 3.5
|
Moderate
|
Most standard tubs
|
| 4.0 – 8.0
|
Fast
|
Large soaking tubs
|
If you have low water pressure at home, choose a faucet designed to work well under those conditions.
Universal vs. Custom Fit
- Universal faucets work with most standard plumbing systems and are easier to install.
- Custom-fit faucets may be needed for unique tubs like whirlpools, jacuzzi tubs, or
walk-in bathtubs
Always check the manufacturer’s specifications to make sure the faucet is compatible with your tub and plumbing system.
How to Replace Faucet Handles of a Bathtub Without Replacing the Entire Fixture
If your faucet handles are cracked, hard to turn, or just outdated, you don’t always need to replace the entire faucet. You can simply replace the handles while keeping the spout and valve in place. It’s a quick, affordable fix that can instantly freshen up the look of your tub.
When Replacing Just the Handles Makes Sense
- The faucet is working fine but the handles are loose, stiff, or broken.
- You're updating your bathroom's style on a budget.
- There's no leaking from the spout or behind the wall.
- You want a quick cosmetic upgrade without dealing with plumbing behind the wall.
What You’ll Need
- Replacement faucet handles (check the brand and model if possible)
- Screwdriver (flathead or Phillips)
- Allen key (for certain handle types)
- Handle adapter or universal kit (if needed)
- Cleaning cloth
- Plumber’s grease (optional)
Step-by-Step: Replacing Faucet Handles Only
Step 1: Turn Off Water Supply
Always start by shutting off your home’s water supply, even if you’re just changing handles. It prevents accidental leaks while you’re working.
Step 2: Remove the Old Handles
- Look for a visible screw holding the handle in place.
- If there's a cap, pop it off with a flathead screwdriver to access the screw.
- Unscrew the handle and pull it off. You might need to wiggle it if it's stuck from mineral buildup.
Step 3: Clean and Inspect the Stem
- Wipe the valve stem clean using a cloth.
- Look for signs of rust or wear.
- If the stem is damaged, the handle won’t stay secure—you may need to replace the stem or the entire valve.
Step 4: Install the New Handle
- Slide the new handle onto the valve stem.
- Use the provided screw to tighten it into place.
- Add the decorative cap if included.
- If it feels loose or doesn’t fit, you may need a handle adapter kit, which allows different handle types to fit onto your existing stem.
Step 5: Turn the Water Back On and Test
- Restore the water supply.
- Turn the new handles to make sure they operate smoothly.
- If they feel stiff, a small amount of plumber’s grease on the stem can help.
Quick Tips
- Always buy handles compatible with your existing valve. If you’re not sure, bring the old handle to the store.
- Universal handle kits can fit most major faucet brands.
- Don’t overtighten screws—it can crack the handle or damage the stem.
- If replacing both hot and cold handles, double-check that you’re placing them on the correct sides.
Maintenance Tips to Make Your New Tub Faucet Last Longer
You’ve successfully completed your bathtub faucet replacement, but that doesn’t mean the job is over. Regular maintenance keeps your new faucet looking clean, working properly, and lasting for years without issues.
Keep It Clean
Cleaning your faucet regularly prevents buildup from minerals, soap, and dirt.
Easy Cleaning Routine:
- Wipe the faucet with a soft cloth after each use to prevent water spots.
- Once a week, use mild dish soap and warm water to clean the surface.
- Rinse thoroughly and dry to avoid residue.
- Avoid harsh cleaners or scrubbing pads that can scratch the finish.
Prevent Mineral Buildup
If you live in an area with hard water, mineral deposits can build up quickly and block water flow.
How to Handle It:
- Soak a cloth in white vinegar and wrap it around the spout or handle base for 20–30 minutes.
- Use a soft brush (like an old toothbrush) to scrub gently.
- Rinse with warm water and dry completely.
Tip: Install a water softener or use faucet filters if buildup happens often.
Check for Loose Parts
Over time, vibration from water pressure can cause screws and fittings to loosen.
Every Few Months:
- Check the handles for wobbling—tighten the screws if needed.
- Look under the spout and handles for signs of leaks.
- Reapply plumber’s tape if a connection starts to drip.
Use Gently
Faucets aren’t meant to be yanked or forced.
- Turn handles with gentle pressure.
- Don’t hang heavy items (like cleaning buckets) from the spout.
- Avoid twisting the faucet body when cleaning or adjusting position.
Replace Small Parts Before They Fail
Sometimes small parts wear out before the faucet itself.
- Keep an extra set screw, washer, and O-ring on hand.
- If water starts dripping, swap out the worn part right away.
- Replacing a $2 washer early can prevent a $200 repair later.
Protect the Finish
If you choose a brushed nickel, chrome, or matte black finish:
- Avoid abrasive cleaners and tools.
- Don’t use bleach or ammonia.
- Use a protective faucet wax if recommended by the manufacturer.
Quick Maintenance Checklist
| Task
|
Frequency
|
Tools Needed
|
| Wipe faucet dry
|
After every use
|
Soft cloth
|
| Deep clean with soap
|
Weekly
|
Dish soap, sponge
|
| Check screws and fittings
|
Every 3–6 months
|
Screwdriver, hex key
|
| Remove mineral buildup
|
As needed
|
Vinegar, soft brush
|
| Inspect for leaks
|
Quarterly
|
Visual check, plumber’s tape
|
Regular maintenance doesn’t take much time, but it can add years to the life of your faucet. That means fewer repairs, no surprise leaks, and a bathroom that always looks and functions great.
What to Do If Your Bathtub Faucet Still Leaks After Replacement
You followed every step, replaced your bathtub faucet, and it looks perfect—but then you notice water still dripping. Don’t panic. This is a common issue and can often be fixed without taking everything apart again.
Pinpoint Where the Leak Is Coming From
Understanding the source of the leak helps you fix it fast.
Dripping from the Spout
If water continues to drip from the faucet even when it's turned off, the issue is likely inside the valve, not the faucet spout. The valve stem or cartridge may be worn out and still allowing water through.
Leaking at the Base
Water leaking around the base of the faucet spout or handle is usually due to:
- A loose connection
- Missing or poorly applied plumber’s tape
- No silicone sealant around the base
- Misaligned fitting
Fixes for Common Leak Issues
If the Spout Is Dripping
- You may need to replace the valve stem or cartridge inside the wall.
- Shut off the water supply again.
- Remove the handle and unscrew the stem or cartridge.
- Take it to a hardware store to get an exact match.
- Install the new part and reassemble the handle.
This fix often solves internal leaks caused by worn-out parts that weren’t replaced during the faucet installation.
If Water Leaks Around the Base
- Remove the spout and check the threads or pipe for wear or damage.
- Rewrap the threads with plumber’s tape (clockwise, 2–3 layers).
- Reinstall the faucet securely, but don’t overtighten.
- Apply a clean line of silicone sealant around the base for waterproofing.
If the Set Screw Is Loose (Slip-On Spouts)
- Flip the faucet spout over and tighten the set screw with a hex key.
- Make sure the faucet sits flush against the wall and doesn’t wiggle.
When to Call a Plumber
Sometimes, the issue runs deeper. Consider calling a professional if:
- The leak is behind the wall
- You see water stains or mold near the tub area
- You hear hissing sounds or pressure issues
- You’ve replaced both the faucet and valve, but it still leaks
Prevent Future Leaks
- Avoid overtightening faucet parts
- Use quality plumber’s tape and sealant
- Choose corrosion-resistant materials
- Don’t force handles; gentle turning extends lifespan
A leak after faucet replacement doesn’t always mean you did something wrong. With a few quick checks, most problems can be fixed in minutes.
Bathtub Faucet Replacement - FAQs
When people search for bathtub faucet replacement, they usually have a lot of practical questions. Here are the most common ones—answered simply and clearly.
Can I Replace a Bathtub Faucet Myself?
Yes. If you’re comfortable using basic tools like a wrench and screwdriver, you can change out a bathtub faucet on your own. Most replacements take between 30 minutes and 2 hours depending on your setup.
Just make sure:
- You shut off the water first
- You have the right faucet type
- You follow the step-by-step instructions carefully
If you're dealing with damaged pipes or a complicated valve system, a plumber might be the better choice.
How Do I Know Which Tub Faucet I Need?
Check three things:
- Connection type (threaded or slip-on)
- Mounting style (wall-mounted or deck-mounted)
- Handle setup (single, double, or three-handle)
Take measurements and photos of your current faucet. Bring them to the store or compare online to ensure a match. If you're unsure, choose a universal faucet that fits most standard installations.
What’s the Average Cost to Replace a Tub Faucet?
If you’re doing it yourself:
- Faucet cost: $25–$150, depending on the style and brand
- Tools and supplies (if you don’t have them): $10–$30
If hiring a plumber:
- Labor cost: $100–$25,0 depending on your location and how complex the installation is
Overall, DIY replacement is usually more affordable, especially if no internal valve work is needed.
How Long Does It Take to Change a Bathroom Tub Faucet?
Here’s a rough timeline for each part:
- Turning off water and setting up: 10 minutes
- Removing old faucet: 15–30 minutes
- Cleaning and prepping: 10–15 minutes
- Installing new faucet and handles: 20–40 minutes
- Testing and sealing: 15 minutes
Most replacements are done in under 2 hours, especially if you have all the materials ready.
Do I Need to Replace the Valve When Replacing the Faucet?
Not always. If your faucet handles and spout are leaking or rusted but the water controls behind the wall are working fine, you can replace the visible parts only.
You should consider replacing the valve if:
- The handles are loose and won’t tighten
- You hear rattling or knocking noises inside the wall
- There’s water dripping from behind the wall
- The valve is corroded or jammed
Replacing a valve involves cutting into the wall and soldering or using a valve kit—this is usually a job for a professional.
Conclusion: You Can Replace Your Bathtub Faucet with Confidence
Replacing a bathtub faucet might seem like a big job at first, but with the right guide, tools, and a little patience, it’s something most homeowners can handle on their own.
Whether your faucet was leaking, rusted, outdated, or simply not working well, going through this replacement process means:
- No more drips or wasted water
- Better water pressure and flow
- A fresh, modern look in your bathroom
- Money saved from not hiring a plumber
Throughout this guide, we’ve shown you how to:
- Identify your faucet type and choose the right replacement
- Remove old bathtub faucet pieces safely and correctly
- Install a new faucet step by step without mistakes
- Fix small problems like leaks and loose parts
- Keep your faucet clean and working for years with simple maintenance tips
And if at any point you run into a challenge that seems beyond a DIY fix, it’s okay to contact a professional. But in most cases, armed with this guide, you’ll be able to handle it yourself.
Your bathroom is one of the most-used rooms in the home. A working, reliable, and good-looking faucet makes everyday routines easier and more enjoyable. Now you know how to make that happen—on your schedule, without the extra cost.
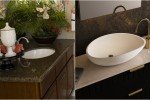
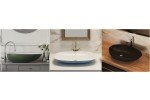
If you’re looking for premium
bathtubs
,
walk-in tubs
or
bath faucets
that match your new faucet setup, browse Aquatica USA’s collection for designs that combine comfort, style, and durability.
Practical suggestions,
Installation,
How tos
We hope you have found this article helpful to make your bathroom your own little haven
Send us an email if you have more questions


.jpg)
.png)
.jpg)
.jpg)
.jpg)
.jpg)
-(web).jpg)
.jpg)
.jpg)
.png)
.jpg)
.jpg)
.jpg)
.jpg)
.jpg)
-(web)-1280x720.jpg)


-(web).jpg)

.png)
.jpg)
.jpg)
-3-(web).jpg)

.jpg)

.jpg)
.jpg)


.jpg)

.jpg)
.jpg)

![Aquatica Monolith White Frrestanding Solid Surface Bathtub 05 1[1]](http://cdn.aquaticausa.com/cache/images/150x100a/data/Aquatica_Monolith_White_Frrestanding_Solid_Surface_Bathtub-05-1[1].jpg)
.jpg)
-800.jpg)


.jpg)
.JPG)
.jpg)


.jpg)
-2.13.jpg)
.jpg)


.jpg)
![Aquatica Millennium Stone Wooden Vanity03 700[1]](http://cdn.aquaticausa.com/cache/images/150x100a/data/Aquatica_Millennium_Stone_Wooden_Vanity03-700[1].jpg)
.jpg)
 (1).jpg)
600.jpg)

![blog how to choose a freestanding tub photo1653905380[1]](http://cdn.aquaticausa.com/cache/images/150x100a/data/blog-how-to-choose-a-freestanding-tub-photo1653905380[1].jpeg)
.jpg)

.jpg)
.jpg)
![Aquatica Baby Boomer 2 Freestanding Solid Surface Walk In Bathtub 04 (web)[1]](http://cdn.aquaticausa.com/cache/images/150x100a/data/Aquatica-Baby-Boomer-2-Freestanding-Solid-Surface-Walk-In-Bathtub-04-(web)[1].jpg)


.jpg)
.jpg)

.jpg)
.jpg)


.jpg)
.jpg)
.jpg)
-(web).jpg)


-(web).jpg)
.jpg)


.jpg)

-(web).jpg)
-(web).jpg)


.jpg)

.jpg)


.jpg)

.jpg)

.jpg)


.jpg)
.jpg)

.jpg)
.jpg)
.jpg)


.jpg)
.jpg)
.jpg)
.jpg)
.jpg)


Comments: