Drip... drip... drip. That sound from your bathtub faucet isn’t just irritating—it’s a slow leak that’s costing you money, wasting water, and potentially damaging your bathroom over time. If you’re tired of the constant dripping, rising water bills, or the worry of mold and rust stains, you’re not alone.
Homeowners and renters across the U.S. search every day for how to fix a leaky bathtub faucet without paying hundreds for a plumber. The good news? Most leaks can be repaired quickly with a few simple tools and some basic know-how—even if you’ve never tackled a plumbing project before.
This guide is designed for DIYers, budget-conscious homeowners, and renters who want a straightforward, stress-free fix. From identifying what’s causing the leak to repairing or replacing worn parts, you’ll find everything you need in one clear step-by-step walkthrough.
What Causes a Leaky Bathtub Faucet?
- Worn Washers or O-Rings: The most common issue; they wear out from daily use.
- Faulty Cartridge or Stem: Especially in newer faucet models.
- Corroded Valve Seat: Minerals from water can damage the connection point.
- High Water Pressure: Can push water past seals.
- Sediment Buildup: Blocks normal flow, causing back-pressure and leaks.
If the leak only occurs when the shower is running, the diverter valve is likely the culprit.
Tools and Materials Needed for Bathtub Faucet Repair
Before starting any bathtub faucet repair, make sure you have the right tools and parts on hand. This not only saves time but also helps you avoid unnecessary frustration mid-repair. Most leaks can be fixed with a few basic items you may already have in your toolbox — along with affordable replacement components easily found at any hardware store.
Basic Tools Checklist
- Flathead and Phillips screwdrivers
- Allen key (if required)
- Adjustable wrench or basin wrench
- Needle-nose pliers
- Utility knife
- Clean rag or cloth
Materials You May Need
- Replacement washers, O-rings, or cartridge
- Plumber's tape (Teflon tape)
- Plumber's grease (silicone-based)
- Bucket (to catch dripping water)
- New faucet or diverter (if needed)
Fixing a Leaky Bathtub Faucet: Step-by-Step Instructions
A dripping bathtub faucet can often be fixed in under an hour with just a few tools and replacement parts. Whether you’re dealing with a worn washer, faulty cartridge, or loose stem, the steps below walk you through the entire process clearly — no plumbing experience required. Follow this simple guide to stop the leak and restore smooth faucet function.
Step 1: Shut Off the Water Supply
- Use the main shut-off valve or a local one near the tub.
- Open the faucet to drain the remaining water from the lines.
Step 2: Remove the Faucet Handle
- Pry off the decorative cap (if present).
- Unscrew the handle using the correct screwdriver or Allen key.
- Gently pull the handle off.
Step 3: Disassemble the Faucet
- Remove the escutcheon (the trim plate).
- Unscrew the retaining nut with your wrench.
- Use pliers to remove the cartridge or stem inside.
Step 4: Inspect and Replace Damaged Parts
- Examine washers, O-rings, and cartridges for cracks or wear.
- Replace with identical, compatible parts.
- Apply plumber’s grease to ensure a snug fit and longer durability.
Step 5: Reassemble the Faucet
- Reinsert the stem or cartridge.
- Tighten the retaining nut.
- Replace the trim and handle.
- Turn the water supply back on.
- Test for leaks.
How to Repair a Bathtub Faucet Leak When the Shower Is Running
Problem: Water leaks from the tub faucet only when the shower is on.
Common Cause: Faulty Diverter Valve
The diverter valve redirects water from the tub to the showerhead. When damaged, water escapes from the tub spout instead of going to the shower.
Step-by-Step Fix:
- Turn off the water supply.
- Remove the diverter handle or pull-up spout.
- Unscrew and remove the diverter mechanism.
- Replace the rubber washer or the entire diverter.
- Grease the new washer lightly.
- Reinstall the diverter and test.
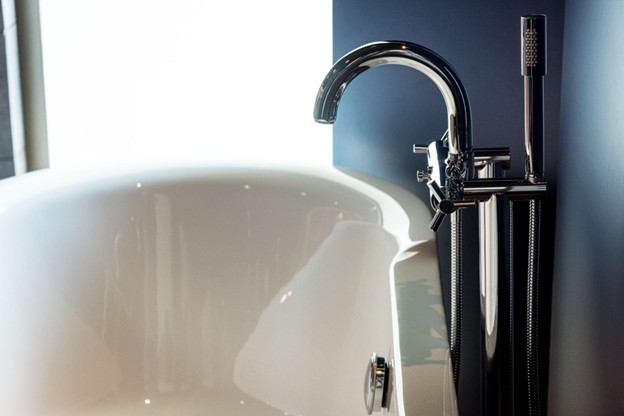
Old Bathtub Faucet Replacement Guide
If repairs haven’t stopped the dripping, it might be time for a full old tub faucet replacement.
Signs It’s Time to Replace
- Persistent leaks despite new parts
- Corrosion or calcium buildup
- Loose or stripped internal components
Replacement Steps
- Turn off the water supply.
- Cut an access hole in the wall behind the faucet (if necessary).
- Remove the existing faucet assembly.
- Match dimensions with a compatible new unit.
- Install using proper fittings and plumber’s tape.
- Turn the water on and test all connections.
How to Fix a Leaking Bathtub Faucet | The Home Depot
Tub Faucet Handle Repair: Fixing Loose or Broken Handles
Loose or stuck handles are often the first sign of wear.
Common Handle Issues
- Loose screws or stripped threads
- Cracked or broken plastic
- Corroded or rusted stems
Repair Tips
- Tighten screws with the correct tool.
- Replace damaged handles or stems.
- Use plumber’s grease to ensure smooth operation.
Broken Bathtub Faucet? When to Repair vs Replace
Not every leak requires a full replacement. But some signs indicate it’s time to upgrade.
When to Opt for a Simple Repair
- The faucet is relatively new
- Only washers or cartridges are worn
- No visible corrosion or damage to threads
- The leak is minimal and started recently
When Replacement Makes More Sense
- The faucet is more than 10–15 years old
- Repeated leaks despite previous fixes
- Visible rust or mineral deposits
- Faucet parts are discontinued or hard to find
- The valve seat is corroded beyond repair
Tip: Replacing an old fixture can also improve water efficiency and enhance the style of your bathroom.
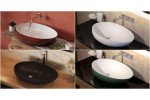
Looking to upgrade? Explore
modern bathtub faucets
from Aquatica USA for sleek, reliable replacements.
How Much Does It Cost to Fix or Replace a Bathtub Faucet?
Whether you go the DIY route or hire a professional, it’s helpful to understand the cost breakdown.
DIY Cost Estimate
| Item
|
Estimated Cost (USD)
|
| Replacement washers/O-rings
|
$1–$5
|
| New cartridge or diverter
|
$10–$100
|
| Plumber’s grease/tape
|
$3–$7
|
| Tools (if needed)
|
$20–$50 (one-time)
|
| Total DIY Range
|
$15–$100
|
Professional Repair Estimate
| Service Type
|
Estimated Cost (USD)
|
| Basic leak repair
|
$150 - $300
|
| Faucet replacement (labor)
|
$150–$350
|
| Full fixture + install
|
$200–$600+
|
Savings Tip: If you already own the basic tools, you can often fix a leaking faucet for under $30.
Pro Tips for Preventing Future Faucet Leaks
Keeping your faucet in top shape reduces the risk of future leaks and water damage.
Maintenance Checklist
- Check and tighten faucet handles monthly.
- Clean aerators and showerheads regularly to remove mineral deposits.
- Use vinegar to remove hard water buildup around seals.
- Turn handles gently to avoid stripping internal parts.
- Annually inspect washers and cartridges for wear.
What to Avoid
- Avoid using harsh cleaners on seals.
- Don’t overtighten faucet handles or connections.
- Never ignore a slow drip—it usually worsens over time.
Need tips on keeping your bath setup pristine?
Read our guide on bathtub care
.
How to Identify the Type of Bathtub Faucet You Have
Understanding your faucet type ensures you buy the correct replacement parts and follow the right steps.
Main Faucet Types
| Faucet Type
|
Description
|
Common Issues
|
| Compression
|
Two separate handles for hot and cold water. Uses washers.
|
Worn washers, leaks from the handle
|
| Cartridge
|
Single or dual handle. Uses a cartridge to control flow.
|
Cartridge wear, inconsistent flow
|
| Ball
|
Single handle with a rotating ball mechanism. Often found in older units.
|
Dripping, hard to rotate
|
| Ceramic Disc
|
Single handle, durable. Uses ceramic discs to control water.
|
Rare leaks, but costly repairs
|
How to Tell Which Type You Have
- Remove the handle and inspect the internal mechanism.
- Cartridges are long, tube-like inserts.
- Ball faucets have a round ball bearing inside.
- Ceramic disc faucets have flat, stacked ceramic pieces.
- Compression faucets use rubber washers and a threaded stem.
Pro Tip: Snap a photo of your faucet with the parts removed and show it at a local hardware store if you're unsure.
How To Identify And Repair A Bathroom Faucet
Troubleshooting Advanced Bathtub Faucet Leaks
Sometimes the leak isn’t straightforward. Here's how to handle trickier issues.
Leaks Behind the Wall
If water is leaking into the wall cavity or dripping from the wall behind the tub spout:
Check:
- Loose pipe connections
- Faulty soldering (especially with copper)
- Cracks in the valve body
Fix:
- Shut off the water.
- Cut access behind the faucet (opposite side of the wall if tiled).
- Inspect and tighten/replace plumbing connections.
Wall leaks often require a plumber if soldering or extensive access is needed.
Faucet Still Leaks After Replacing Parts?
If you’ve replaced the washer, cartridge, or diverter, but the drip persists:
Consider:
- Valve seat corrosion – use a seat wrench or seat grinder to smooth or replace.
- Wrong size replacement parts – double-check part numbers.
- Sediment buildup – flush water lines before reassembling.
Recap: Key Fixes Covered
- Replacing washers, O-rings, and cartridges
- Repairing diverter valves for shower-related leaks
- Identifying faucet types and choosing the correct parts
- Knowing when to replace instead of repair
Ready for an Upgrade?
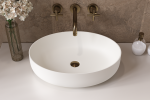
If your old tub faucet replacement is overdue, or you're planning a bathroom remodel, trust AquaticaUSA’s selection of modern
bathtub faucets
.
Shop High-Quality Bathtub Faucets
You’ll find:
- Single and double-handle options
- Wall-mounted and deck-mounted styles
- Premium finishes and long-lasting materials
Need help choosing? Our support team can walk you through compatibility and installation queries.
Bonus: Maintenance Checklist
Keeping your bathtub faucet in good condition doesn’t just prevent future leaks — it also extends the life of your fixture and maintains water efficiency. With a few simple maintenance steps done regularly, you can avoid costly repairs and enjoy consistent performance for years to come.
Monthly Checklist
- Check for drips or moisture around the base
- Lightly tighten handles
- Clean aerators and diverters
Seasonal Care (Every 6 Months)
- Remove mineral buildup with a vinegar soak
- Inspect the faucet and spout for corrosion
- Lubricate moving parts with plumber’s grease
Frequently Asked Questions (FAQ)
What Is the Most Common Cause of a Leaky Tub Faucet?
Worn-out rubber washers and O-rings are the most frequent culprits. Over time, they degrade and allow water to seep through.
Can I Fix a Leaky Bathtub Faucet Myself?
Yes—most repairs are manageable with basic tools and replacement parts. This guide walks you through all the steps.
How Long Does It Take to Fix a Leaky Faucet?
A typical repair takes 30–60 minutes, depending on experience and faucet condition.
Do I Have to Turn Off the Water to Fix a Faucet Leak?
Yes, always shut off the water supply before beginning disassembly to avoid flooding or injury.
How Much Does It Cost to Fix a Leaky Bathtub Faucet?
DIY repairs usually cost between $15–$100. Hiring a plumber may cost $150–$350, depending on the job.
Can a Dripping Bathtub Faucet Cause Damage?
Yes. Persistent leaks can lead to water damage, mold, or increased water bills over time.
Why Does My Tub Faucet Drip After I Turn It Off?
This often points to a faulty washer or worn cartridge not sealing properly.
Practical suggestions,
Accessories,
How tos,
Installation,
Materials and composition
We hope you have found this article helpful to make your bathroom your own little haven
Send us an email if you have more questions


.jpg)
.jpg)
.jpg)
-3-(web).jpg)
.jpg)
.jpg)
-(web).jpg)
.jpg)
.jpg)
.png)
.jpg)
.jpg)
.jpg)
.jpg)
.jpg)
-(web)-1280x720.jpg)


-(web).jpg)

.png)
.jpg)
.jpg)
-3-(web).jpg)

.jpg)

.jpg)
.jpg)


.jpg)

.jpg)
.jpg)

![Aquatica Monolith White Frrestanding Solid Surface Bathtub 05 1[1]](http://cdn.aquaticausa.com/cache/images/150x100a/data/Aquatica_Monolith_White_Frrestanding_Solid_Surface_Bathtub-05-1[1].jpg)
.jpg)
-800.jpg)


.jpg)
.JPG)
.jpg)


-2.13.jpg)
.jpg)


.jpg)
![Aquatica Millennium Stone Wooden Vanity03 700[1]](http://cdn.aquaticausa.com/cache/images/150x100a/data/Aquatica_Millennium_Stone_Wooden_Vanity03-700[1].jpg)
.jpg)
 (1).jpg)
600.jpg)

![blog how to choose a freestanding tub photo1653905380[1]](http://cdn.aquaticausa.com/cache/images/150x100a/data/blog-how-to-choose-a-freestanding-tub-photo1653905380[1].jpeg)
.jpg)

.jpg)
.jpg)
![Aquatica Baby Boomer 2 Freestanding Solid Surface Walk In Bathtub 04 (web)[1]](http://cdn.aquaticausa.com/cache/images/150x100a/data/Aquatica-Baby-Boomer-2-Freestanding-Solid-Surface-Walk-In-Bathtub-04-(web)[1].jpg)


.jpg)
.jpg)

.jpg)
.jpg)


.jpg)
.jpg)
.jpg)
-(web).jpg)


-(web).jpg)
.jpg)


.jpg)

-(web).jpg)
-(web).jpg)


.jpg)

.jpg)


.jpg)

.jpg)

.jpg)


.jpg)
.jpg)

.jpg)
.jpg)
.jpg)


.jpg)
.jpg)
.jpg)
.jpg)
.jpg)


Comments: