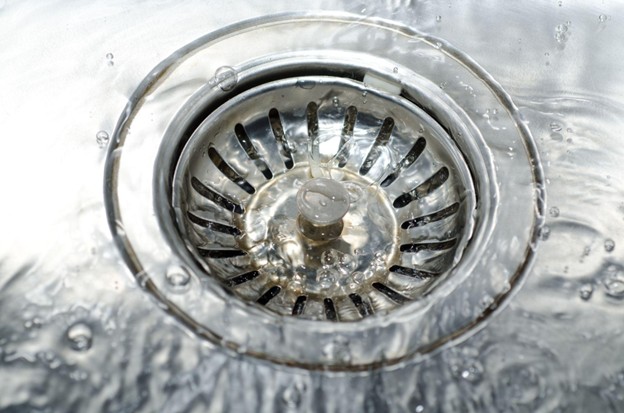
Is your bathtub draining slowly? Noticing rust, leaks, or a broken stopper? Removing a bathtub drain might sound complicated, but it’s actually a straightforward project you can handle with a few tools and some patience. Whether you're fixing a stubborn clog, replacing old hardware, or installing a new drain assembly, understanding how to remove a bathtub drain correctly can save you time, money, and frustration.
In this complete guide, you’ll learn how to identify your drain type, what tools you'll need, and the exact steps to safely remove—and even replace—your tub drain without damaging your fixture. The instructions are clear, beginner-friendly, and supported with helpful videos to walk you through each stage of the process.
Let’s get started.
See Also:
Noisy Freestanding Bathtub Draining Problem
Tools and Materials Needed to Remove a Bathtub Drain
Before you get started, having the right tools on hand will make the job quicker, safer, and a lot less frustrating. Whether you're dealing with a simple push-pull stopper or a corroded drain that hasn’t moved in decades, the right gear ensures you can remove the drain without damaging your tub.
Below is a checklist of basic tools most DIYers already have, plus a few optional tools that can really come in handy, especially for stubborn or stuck drains.
Basic Tools for Tub Drain Removal
- Flathead screwdriver
- Phillips screwdriver
- Adjustable pliers or wrench
- Drain wrench or tub drain extractor tool
- Silicone lubricant or penetrating oil
- Rags or towels
- Flashlight
Optional Tools That Make It Easier
- Tub drain removal tool (available at most hardware stores)
- Mini hacksaw (for corroded or broken drains)
- Needle-nose pliers
- Bucket (to catch debris or water)
Safety Tips Before You Start
- Always turn off the water supply if you're replacing plumbing parts.
- Wear gloves to protect your hands from sharp metal edges.
- Place a towel or drop cloth in the tub to prevent scratching the surface.
Tools and Materials You'll Need
Before starting, gather the following:
- Drain removal tool (also known as a drain wrench or dumbbell wrench)
- Adjustable wrench
- Screwdriver
- Needle-nose pliers
- Plumber's putty
- Penetrating oil (like WD-40)
- Hairdryer (optional, for softening plumber's putty)
- Clean cloth
How to Identify Your Bathtub Drain Type
Before removing the drain, it's important to know what type you’re working with. Here are the six most common bathtub drain stoppers and how to recognize them:
Push-Pull Drain Stopper
- Operated by pulling up to open and pushing down to close.
- The top cap is typically rounded.
- Removal: Unscrew the cap by turning it counterclockwise. You may need to use pliers if it's tight.
Toe-Touch Drain Stopper
- Functions by pressing the stopper with your toe.
- Opens and closes with a simple push.
- Removal: Put it in the open position, twist the cap counterclockwise, then unscrew the mounting screw underneath.
Trip-Lever Drain Stopper
- Controlled by a lever on the overflow plate.
- Doesn’t have a visible stopper; it uses a plunger inside the pipe.
- Removal: Unscrew the overflow plate, pull out the entire linkage assembly.
Lift-and-Turn Drain Stopper
- Rotates to open and close.
- Features a small knob on top.
- Removal: Lift the stopper slightly and turn it counterclockwise. Unscrew the knob or the whole top piece, then use a screwdriver for the base.
Flip-It Drain Stopper
- Uses a toggle lever to open and close.
- Usually sealed with an internal rubber gasket.
- Removal: Flip the lever to the open position and pull the stopper straight out.
Pop-Up Drain Stopper
- Controlled by a lever on the overflow faceplate.
- The stopper pops up when the lever is activated.
- Removal: Flip the overflow lever up, pull the stopper plug and rocker arm from the drain, then remove the lever assembly from behind the plate.
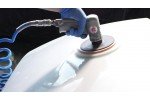
Step-by-Step Guide to Removing a Bathtub Drain
1. Remove the Drain Stopper
The method depends on your stopper type
- Lift-and-Turn Stopper: Lift the stopper and turn it counterclockwise to remove.
- Push-Pull Stopper: Pull up and turn counterclockwise.
- Toe-Touch Stopper: Press to open, then unscrew the cap counterclockwise.
- Trip-Lever Stopper: Remove the overflow plate and extract the linkage.
Note: If you're unsure about your stopper type, this video provides a visual guide:
2. Apply Penetrating Oil
Spray penetrating oil around the drain flange and let it sit for about 15 minutes. This helps loosen any corrosion or buildup.
3. Use a Drain Removal Tool
Insert the drain removal tool into the drain and turn counterclockwise using an adjustable wrench. If you don't have a drain wrench, needle-nose pliers can be used as an alternative:
4. Clean the Drain Opening
Once the drain is removed, clean the area thoroughly. Remove any old plumber's putty and debris to prepare for the new drain installation.
How to remove bathtub drain
Tips for Stubborn Drains
- Heat Application: Use a hairdryer to warm the drain area. Heat can soften old plumber's putty, making removal easier.
- Alternative Tools: If standard tools fail, a tub drain extractor tool can provide additional grip:
Installing a New Bathtub Drain
After removing the old drain, installing a new one is straightforward:
- Apply Plumber's Putty: Roll a bead of plumber's putty and place it under the flange of the new drain.
- Insert and Tighten: Place the new drain into the opening and tighten it using the drain wrench.
- Clean Excess Putty: Wipe away any putty that squeezes out.
For a visual guide on installing a new drain:
Replacing a Tub Drain: Bathtub Drain Removal and Replacement
By following these steps, you can successfully remove and replace your bathtub drain, enhancing your bathroom's functionality and appearance. If you encounter any challenges or have further questions, feel free to ask!
Step-by-Step: Removing Specific Bathtub Drain Types
Let’s now walk through how to remove each type, with specific instructions for each:
How to Remove a Push-Pull Drain Stopper
- Pull up the stopper to the open position.
- Use your hand or pliers to unscrew the cap.
- Remove the exposed screw using a flathead screwdriver.
- Lift the stopper out of the drain.
How to Remove a Toe-Touch Drain
- Press the stopper to open it.
- Twist the cap counterclockwise to unscrew it.
- Use a screwdriver to remove the screw inside.
- Pull out the drain body from the drain flange.
How to Remove a Trip-Lever Drain Stopper
- Use a screwdriver to remove the two screws on the overflow plate.
- Gently pull the trip lever mechanism straight out of the overflow tube.
- Clean the mechanism and inspect for damage.
How to Remove a Lift-and-Turn Drain Stopper
- Lift the stopper slightly and turn the knob counterclockwise.
- If the knob doesn’t come off, try unscrewing the entire cap.
- Use a screwdriver to remove the securing screw.
- Remove the stopper from the drain.
How to Remove a Flip-It Drain Stopper
- Flip the toggle to the open position.
- Grip the stopper firmly and pull upward with a slight twisting motion.
- Clean and inspect for wear.
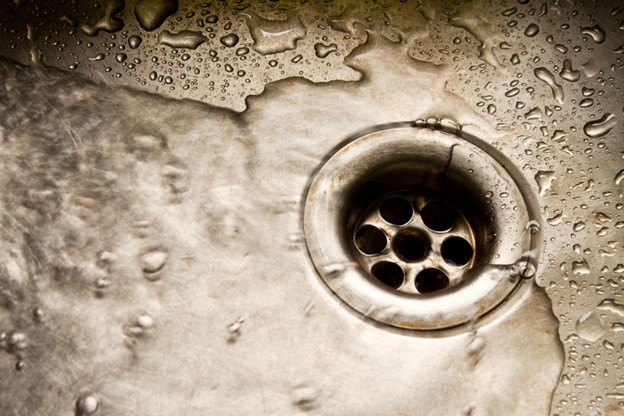
How to Remove a Stuck or Broken Bathtub Drain
Sometimes a drain just won’t budge. Corrosion, old plumber’s putty, or stripped threads can make removal more difficult, but not impossible. Below are reliable methods for handling stubborn bathtub drains.
Using a Tub Drain Extractor Tool
If the crossbars inside the drain are broken or missing, a drain wrench won’t work. That’s when a tub drain extractor (also called a dumbbell tool or internal pipe wrench) comes in handy.
Steps:
- Insert the extractor into the drain body.
- Use a wrench to rotate it counterclockwise.
- Apply steady torque, not jerky motions, to avoid damaging the tub.
These tools grip the inside wall of the drain, not the crossbars.
What to Do If the Drain Cover Won’t Come Off
If the top of the drain (flange or stopper cover) is stuck:
- Spray penetrating oil (like WD-40 or PB Blaster) around the base.
- Let it soak for 10–15 minutes to loosen any old plumber’s putty or rust.
- Try turning the drain again using a drain wrench or pliers.
Tip: Heating the area with a hairdryer can help soften hardened plumber’s putty.
Removing a Rusted or Damaged Drain Flange
If all else fails, and the flange is too damaged to unscrew, cut it out carefully:
Steps:
- Use a mini hacksaw to make two small vertical cuts in the metal flange.
- Carefully insert a flathead screwdriver between the cuts and pry out the metal wedge.
- Repeat as needed until the flange comes loose.
Be extremely cautious to avoid scratching or chipping the enamel tub surface.
Cleaning the Drain Area After Removal
Once you’ve successfully removed the old drain:
- Clean away any leftover plumber’s putty with a plastic scraper.
- Wipe the area down with a damp rag to remove debris and buildup.
- Inspect the threads for damage before installing the new drain.
When Not to Force It
If the drain is severely rusted or the tub is fragile (e.g., old porcelain or cast iron), avoid using too much force. Excess torque can:
- Crack the tub enamel.
- Damage the pipe threads.
- Break internal parts that are hard to reach without opening the wall.
In these cases, it may be worth consulting a professional plumber to avoid more expensive repairs.
How to Replace or Install a New Bathtub Drain
Once you've successfully removed the old or damaged drain, it's time to install a new one. Whether you're upgrading to a modern style or replacing worn-out parts, these steps will guide you through a clean, secure installation.
How to Install a Tub Drain Assembly
Tools & Materials:
- New drain assembly kit
- Plumber’s putty or silicone caulk (check product recommendations)
- Tub drain wrench
- Adjustable pliers
Steps:
- Clean the Drain Opening: Wipe away old putty and grime with a cloth or plastic scraper.
- Apply Plumber’s Putty: Roll a small amount of putty into a rope and place it under the flange of the new drain.
- Insert and Tighten the Drain
- Place the new drain into the opening.
- Use a drain wrench or pliers to turn it clockwise until it’s snug.
- Avoid overtightening, which can crack the tub or deform the gasket.
- Remove Excess Putty: Once the flange is tight, wipe away any putty that oozes out from under the drain.
How to Install a Drain in a New Tub
If you’re working on a remodel or new installation, here’s how to install a full drain-and-overflow kit.
Steps:
- Attach the Overflow Pipe
- Position the overflow elbow behind the tub wall.
- Secure the overflow cover and gasket on the inside with screws.
- Connect the T-Fitting and Tailpiece: Use slip nuts or solvent weld connections depending on your kit. Make sure the connections are watertight.
- Install the Drain Flange
- Apply plumber’s putty under the flange.
- Insert the flange from inside the tub.
- Tighten it into the waste shoe using a drain wrench.
- Test for Leaks: Fill the tub halfway, then check all joints and connections for signs of leaks.
How to Replace a Bathtub Drain Lever or Stopper
You can replace a malfunctioning stopper or lever without removing the entire drain assembly.
For Trip-Lever Stoppers:
- Remove the overflow cover and trip-lever linkage.
- Inspect the linkage rod, plunger, and spring.
- Insert the new assembly, making sure the plunger aligns vertically.
- Secure the faceplate and test the stopper.
For Toe-Touch or Push-Pull:
- Unscrew and lift out the old stopper.
- Insert the new one into the drain flange.
- Secure it by screwing into the drain crossbar or using a bolt, depending on design.
Pro Tip:
Use Teflon tape on threaded metal connections to improve sealing and make future removal easier.
Final Tips for Fixing or Changing Your Bathroom Drain
Once you’ve gone through the drain removal and replacement process, there are a few important takeaways to help protect your tub and plumbing long-term.
When to Call a Professional
While many bathtub drain issues are DIY-friendly, you should consider hiring a plumber if:
- The drain is severely corroded or fused to the pipe.
- The crossbars are broken and cutting the flange feels too risky.
- The tub is made of fragile materials (e.g., cast iron, porcelain enamel) that may crack under pressure.
- The overflow or drain pipes are leaking behind the wall or under the floor.
How to Prevent Clogs in the Future
A few proactive habits can dramatically reduce clogging and the need for frequent drain maintenance:
- Use a drain strainer or hair catcher to trap debris.
- Avoid rinsing large amounts of hair, soap scum, or oils down the drain.
- Clean your stopper every 2–4 weeks, especially if you have long hair.
- Flush your drain with boiling water once a month.
Best Practices for Long-Term Maintenance
Proper upkeep ensures your drain works efficiently and lasts longer.
- Inspect your stopper mechanism every 3–6 months.
- Replace worn-out gaskets or seals before leaks develop.
- Apply a small amount of Teflon tape to threaded connections if reinstalling.
- Avoid using harsh chemicals — opt for enzymatic drain cleaners instead.
Remove Bathtub Drain - Frequently Asked Questions
To make your DIY process even easier, here are clear answers to the most common questions people ask when learning how to remove a bathtub drain.
How Do You Replace a Bathtub Drain Stopper?
- First, identify the type of stopper (push-pull, toe-touch, trip lever, etc.).
- Remove it using the appropriate method (unscrew or pull out).
- Inspect for rust, wear, or debris.
- Replace with a new stopper that matches your existing drain flange or assembly.
What’s the Easiest Way to Unscrew a Shower Drain?
Use a tub drain wrench or a drain extractor tool. These tools are designed to fit into the crossbars or internal threads, allowing you to turn the drain counterclockwise without damaging the tub.
- Spray with penetrating oil first.
- Apply steady torque.
- Avoid using forceful jerks.
Can I Change Out a Tub Drain Without a Plumber?
Yes. Most homeowners can replace a drain themselves using basic tools. The key is understanding the type of stopper and flange you're working with, as well as having access to the proper wrench or extractor. If you're working with a fragile or very old tub, or the drain is rusted solid, it may be safer to hire a professional.
How to Fix a Pop-Up Bathtub Drain Stopper That’s Stuck?
- Remove the overflow plate.
- Extract the rocker arm and spring mechanism.
- Clean out any hair, soap scum, or buildup.
- Inspect for rust or broken parts.
- Replace worn components or reinstall if everything looks functional.
Do You Need a Special Tool to Remove a Tub Drain?
Not always, but a tub drain wrench or drain extractor makes the job much easier and prevents damage to the tub. In a pinch, needle-nose pliers or a flathead screwdriver may work if the crossbars are intact.
How Do You Remove a Shower Drain Cover Without Screws?
- Insert a flathead screwdriver or utility knife under the edge of the drain cover.
- Pry gently upward.
- If stuck, twist back and forth to loosen the seal.
How to Unclog a Bathtub Drain Without Tools?
- Boiling water – pour slowly into the drain.
- Baking soda + vinegar – pour ½ cup of baking soda, followed by 1 cup of vinegar.
- Plunger – create a seal over the drain and pump forcefully.
- Drain snake – even a wire hanger can help if hair is the issue.
When Should I Replace the Entire Drain Assembly?
- If the drain flange is cracked, rusted, or permanently seized.
- If you're remodeling and need a matching finish.
- If your existing drain has recurring clog issues or damage that cleaning won’t solve.
Final Thoughts
Removing a bathtub drain doesn’t require plumbing expertise — just the right approach, a few tools, and a bit of patience. Whether you’re dealing with a clogged drain, a broken stopper, or updating your hardware, following these clear, step-by-step instructions will help you avoid frustration and costly mistakes.
Remember: Always identify your drain type first, use proper tools, and don’t rush the job.
Practical suggestions,
Accessories,
How tos,
Installation,
Materials and composition
We hope you have found this article helpful to make your bathroom your own little haven
Send us an email if you have more questions


-3-(web).jpg)
.jpg)

.jpg)
.jpg)
-(web).jpg)
.jpg)
.jpg)
.png)
.jpg)
.jpg)
.jpg)
.jpg)
.jpg)
-(web)-1280x720.jpg)


-(web).jpg)

.png)
.jpg)
.jpg)
.jpg)

.jpg)

.jpg)
.jpg)


.jpg)

.jpg)
.jpg)


.jpg)
-800.jpg)


.jpg)
.JPG)
.jpg)


-2.13.jpg)
.jpg)


.jpg)

.jpg)
 (1).jpg)
600.jpg)


.jpg)

.jpg)
.jpg)
[1].jpg)


.jpg)
.jpg)

.jpg)
.jpg)


.jpg)
.jpg)
.jpg)
-(web).jpg)


-(web).jpg)
.jpg)


.jpg)

-(web).jpg)
-(web).jpg)


.jpg)

.jpg)


.jpg)

.jpg)

.jpg)


.jpg)
.jpg)

.jpg)
.jpg)
.jpg)


.jpg)
.jpg)
.jpg)
.jpg)
.jpg)


Comments: